Installing the ELD Engine Module
Last updated August 11, 2025
Switchboard ELD devices are connected to the diagnostic port of the truck.
Switchboard offers different cables depending on the type/make/model/year of your vehicle. To find out which cable you should use, go here: Determining ECM cable to use with the Switchboard Engine Module. To purchase a Switchboard Engine Module cable, visit the Switchboard online store.
If your ELD Engine Module is connected, you can visit the guide establishing a connection to the ELD Engine Module, visit the guide on connecting to the ELD Engine Module here .
General Installation Instructions
If you need specific instructions on how to install the RP1226 Cable, visit the guide on RP1226 Cable Installation here .
To connect the ELD module with the ELD cable, follow the steps below:
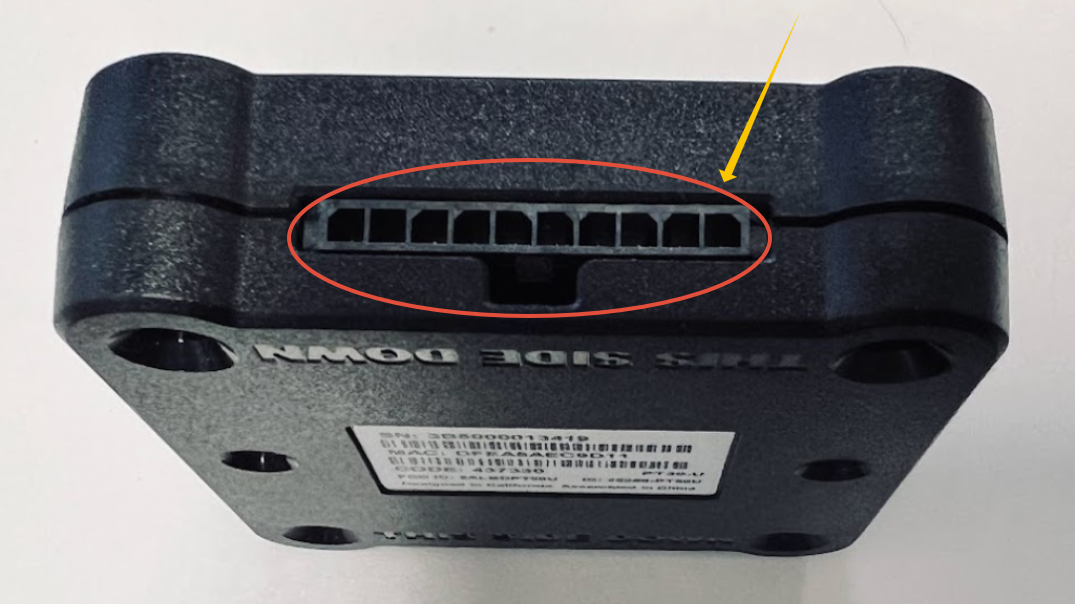
- Identify the latch connection on the ELD device. If you can see the ELD image below it should be side of the ELD device.
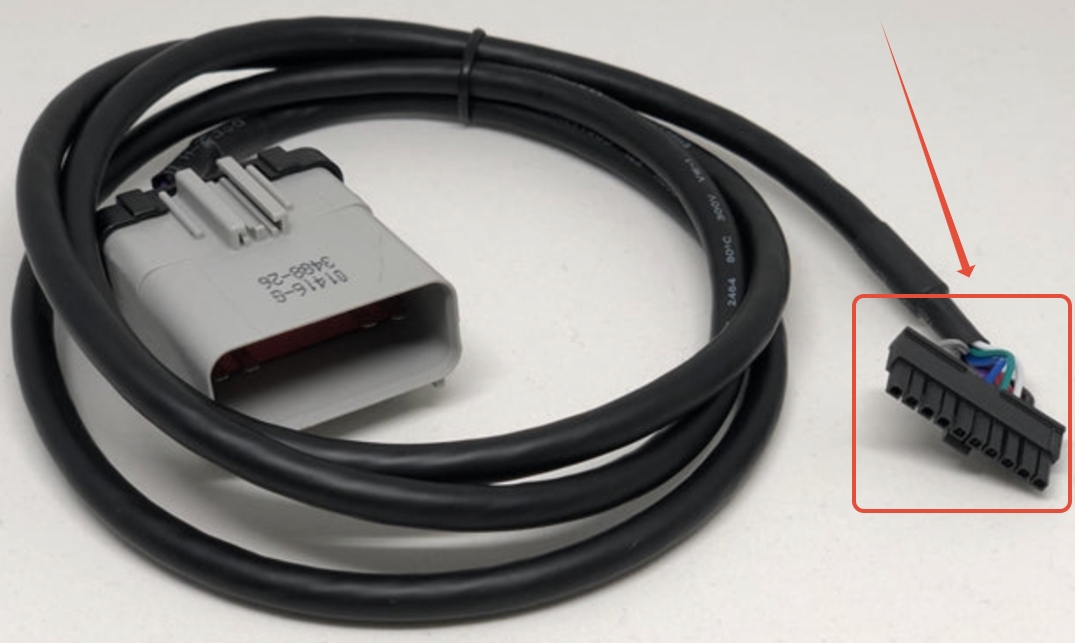
- Identify the end of the cable to connect with the ELD device, for example, let us take the RP1226 connector, please see the below image to find the connecting end.
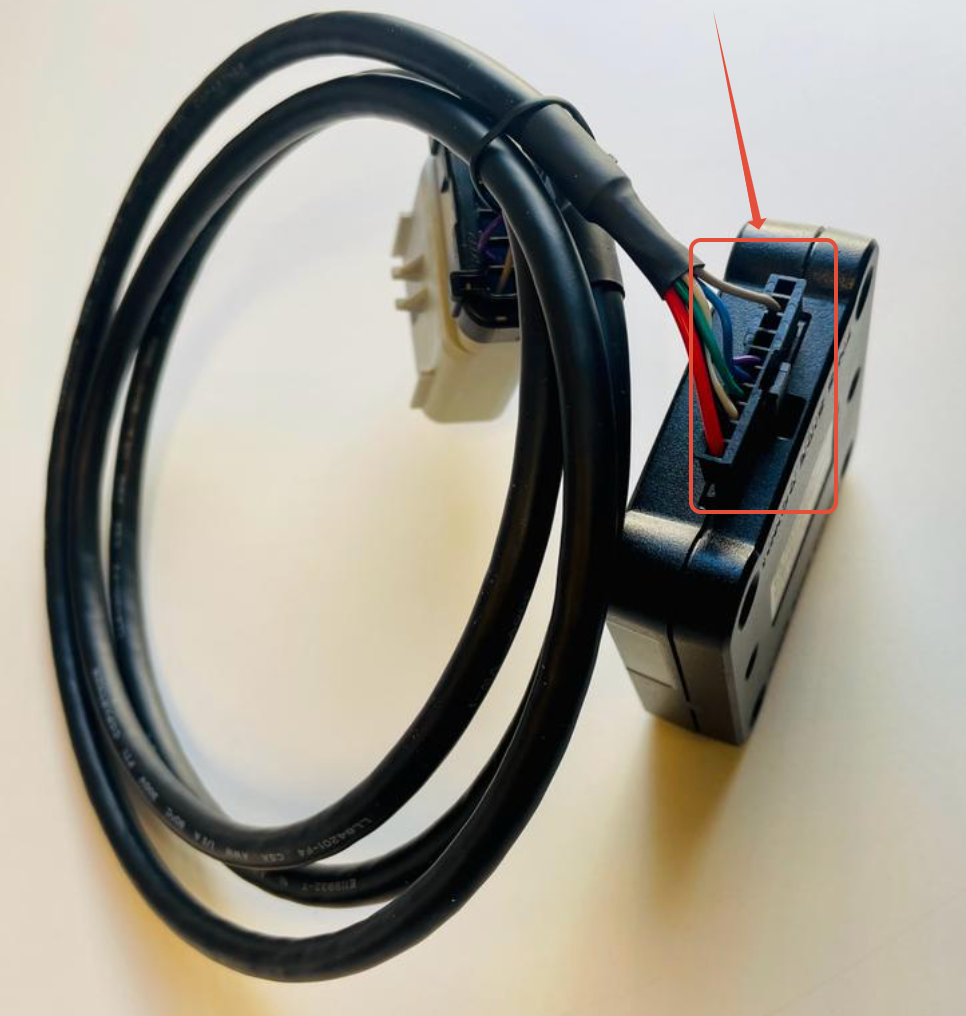
- Connect the ELD module with ELD cable as shown below, make sure that you hear the click sound once you connect the cable and the ELD module.
- Connect the End of the ELD cable to the trucks diagnostic port as shown in the picture below.
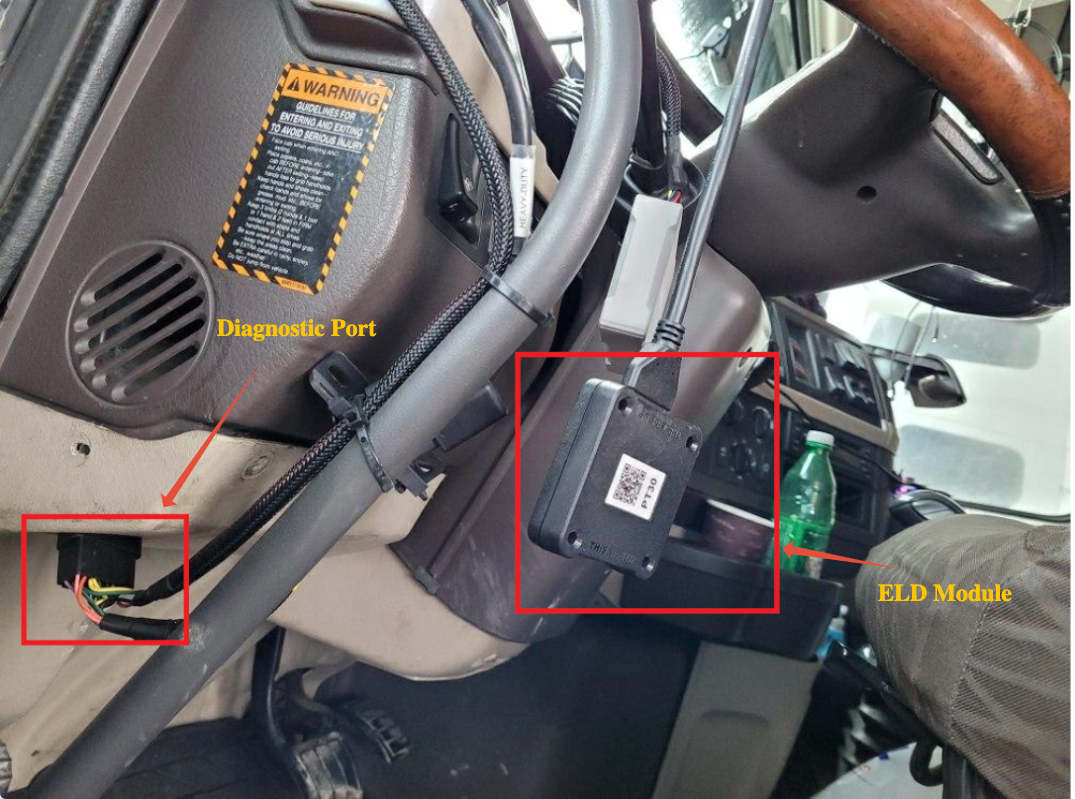
- Once you connect the ELD module to the trucks Diagnostics port, turn on the truck, there will be light on the ELD module. Wait for the light to become sold then open the Switchboard app and connect it with the module.
Was this article helpful?