Creating Geofences
Last updated September 5, 2024
Switchboard allows you to create geofences which allow you to set locations which you can get alerts and reports on when your drivers enter and exit those location
Note: This feature is only available for companies that have the Switchboard Cloud Platform feature enabled. To learn more, go here: Switchboard Fleet Management
First, log in to Switchboard on https://app.onswitchboard.com . Select the Map tab
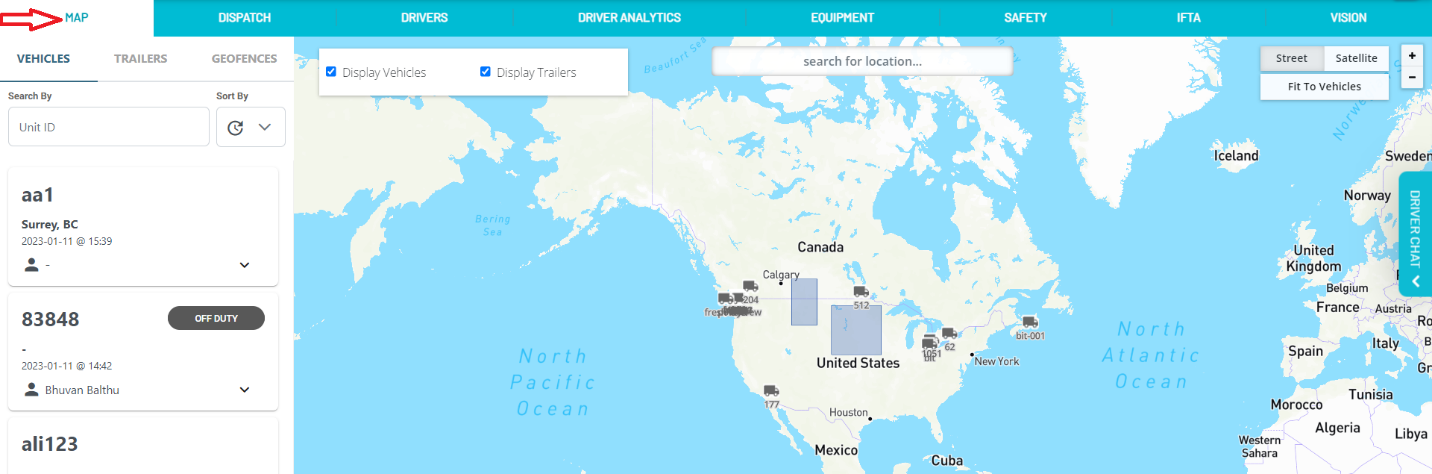
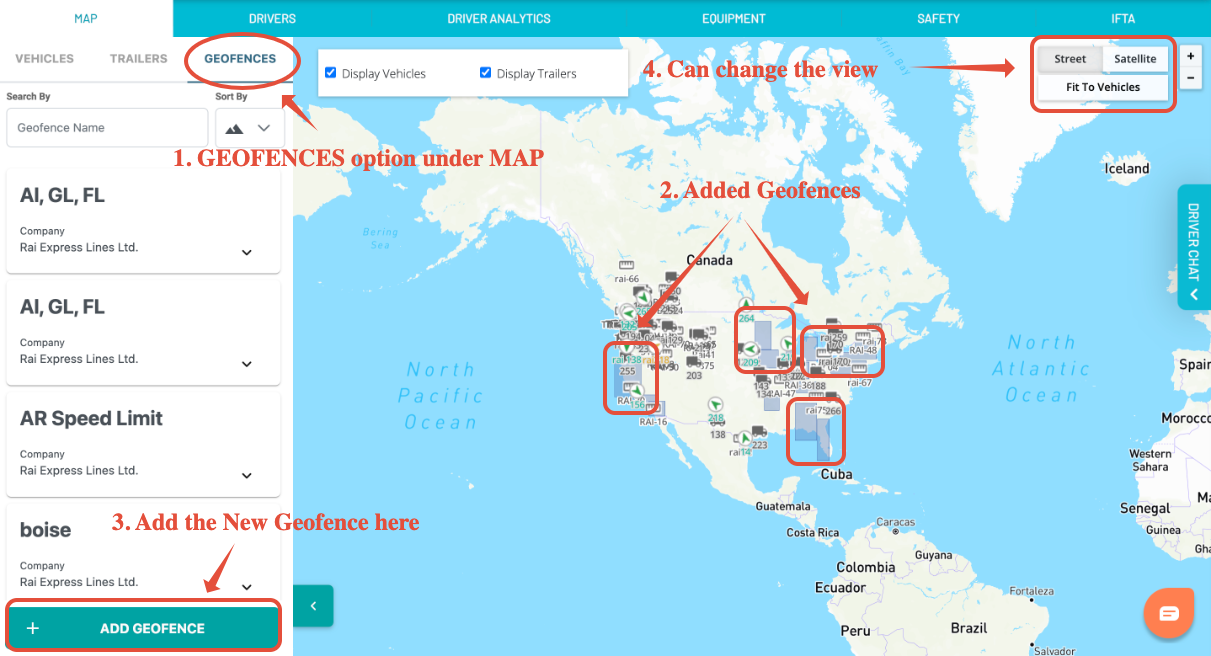
To create a geofence, log in to Switchboard on https://app.onswitchboard.com . Select the "Map" section, and you'll see your map. On the left sidebar, select "Geofences".
Creating a Geofence
Click on the Add Geofence button at the bottom of the screen, then manually click on the map area where you wanted to add the Geofence.
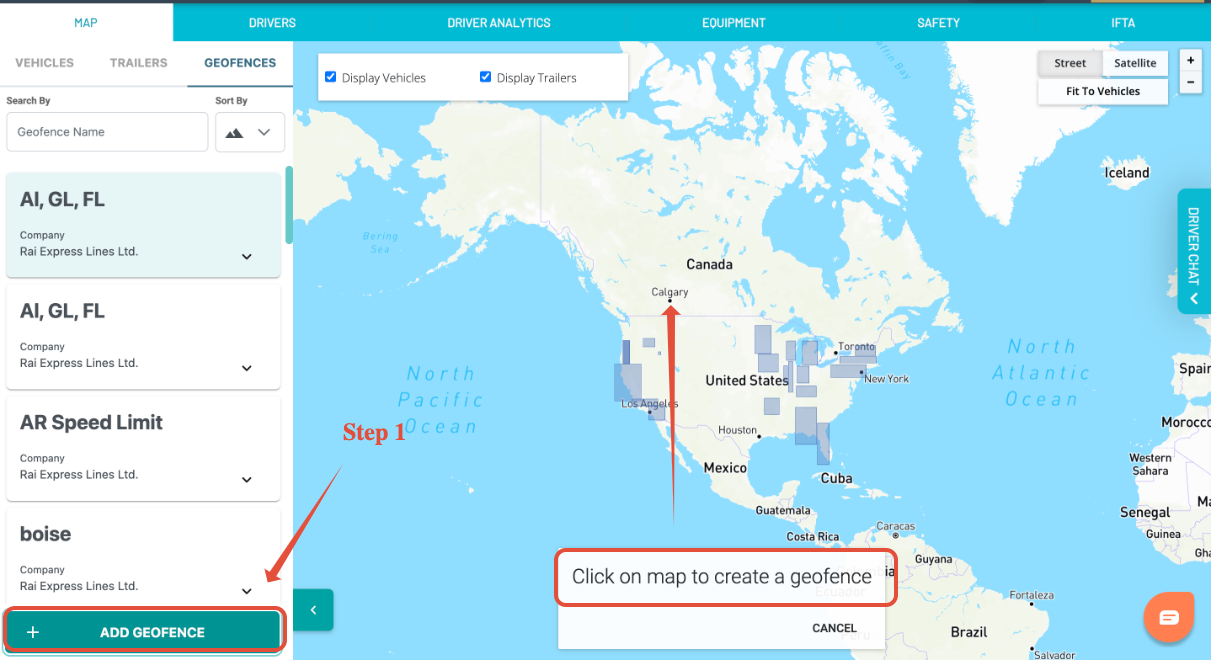
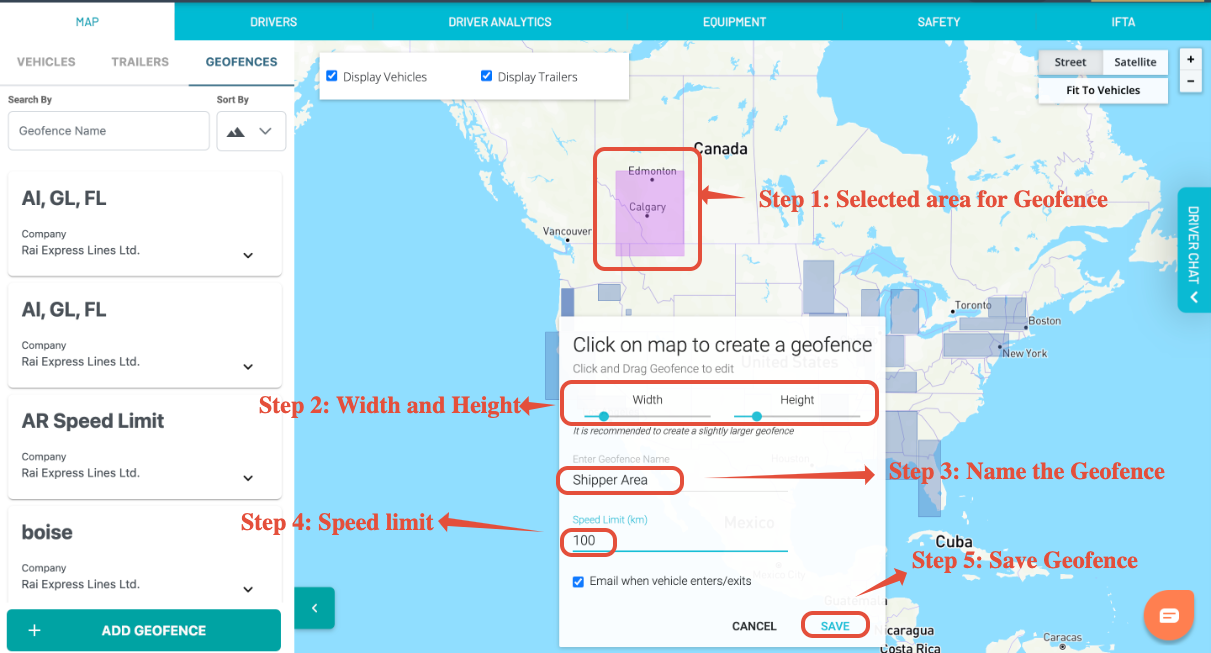
Once you click on the map as shown in the previous image, a box will shows up on the map where you wanted to create a geofence.
- You can adjust the Geofence width & height as required.
- You can also have a geofence specific speed limit for vehicles to follow in this region.
- If the driver crosses the speed, then an email notification will be sent to the registered email address.
- Select Save to create the Geofence.
And that's it! You have created your geofence. Now anytime your vehicles enter/exit this geofence, you will receive a notification that your vehicle has done so.
To learn about viewing enter/exit reports for geofences, please go here: View Geofence Enter/Exit Events